12. Advanced Features
Version History and Change Tracking
This widget is locked on the Free plan and available on the Pro and Enterprise plans.
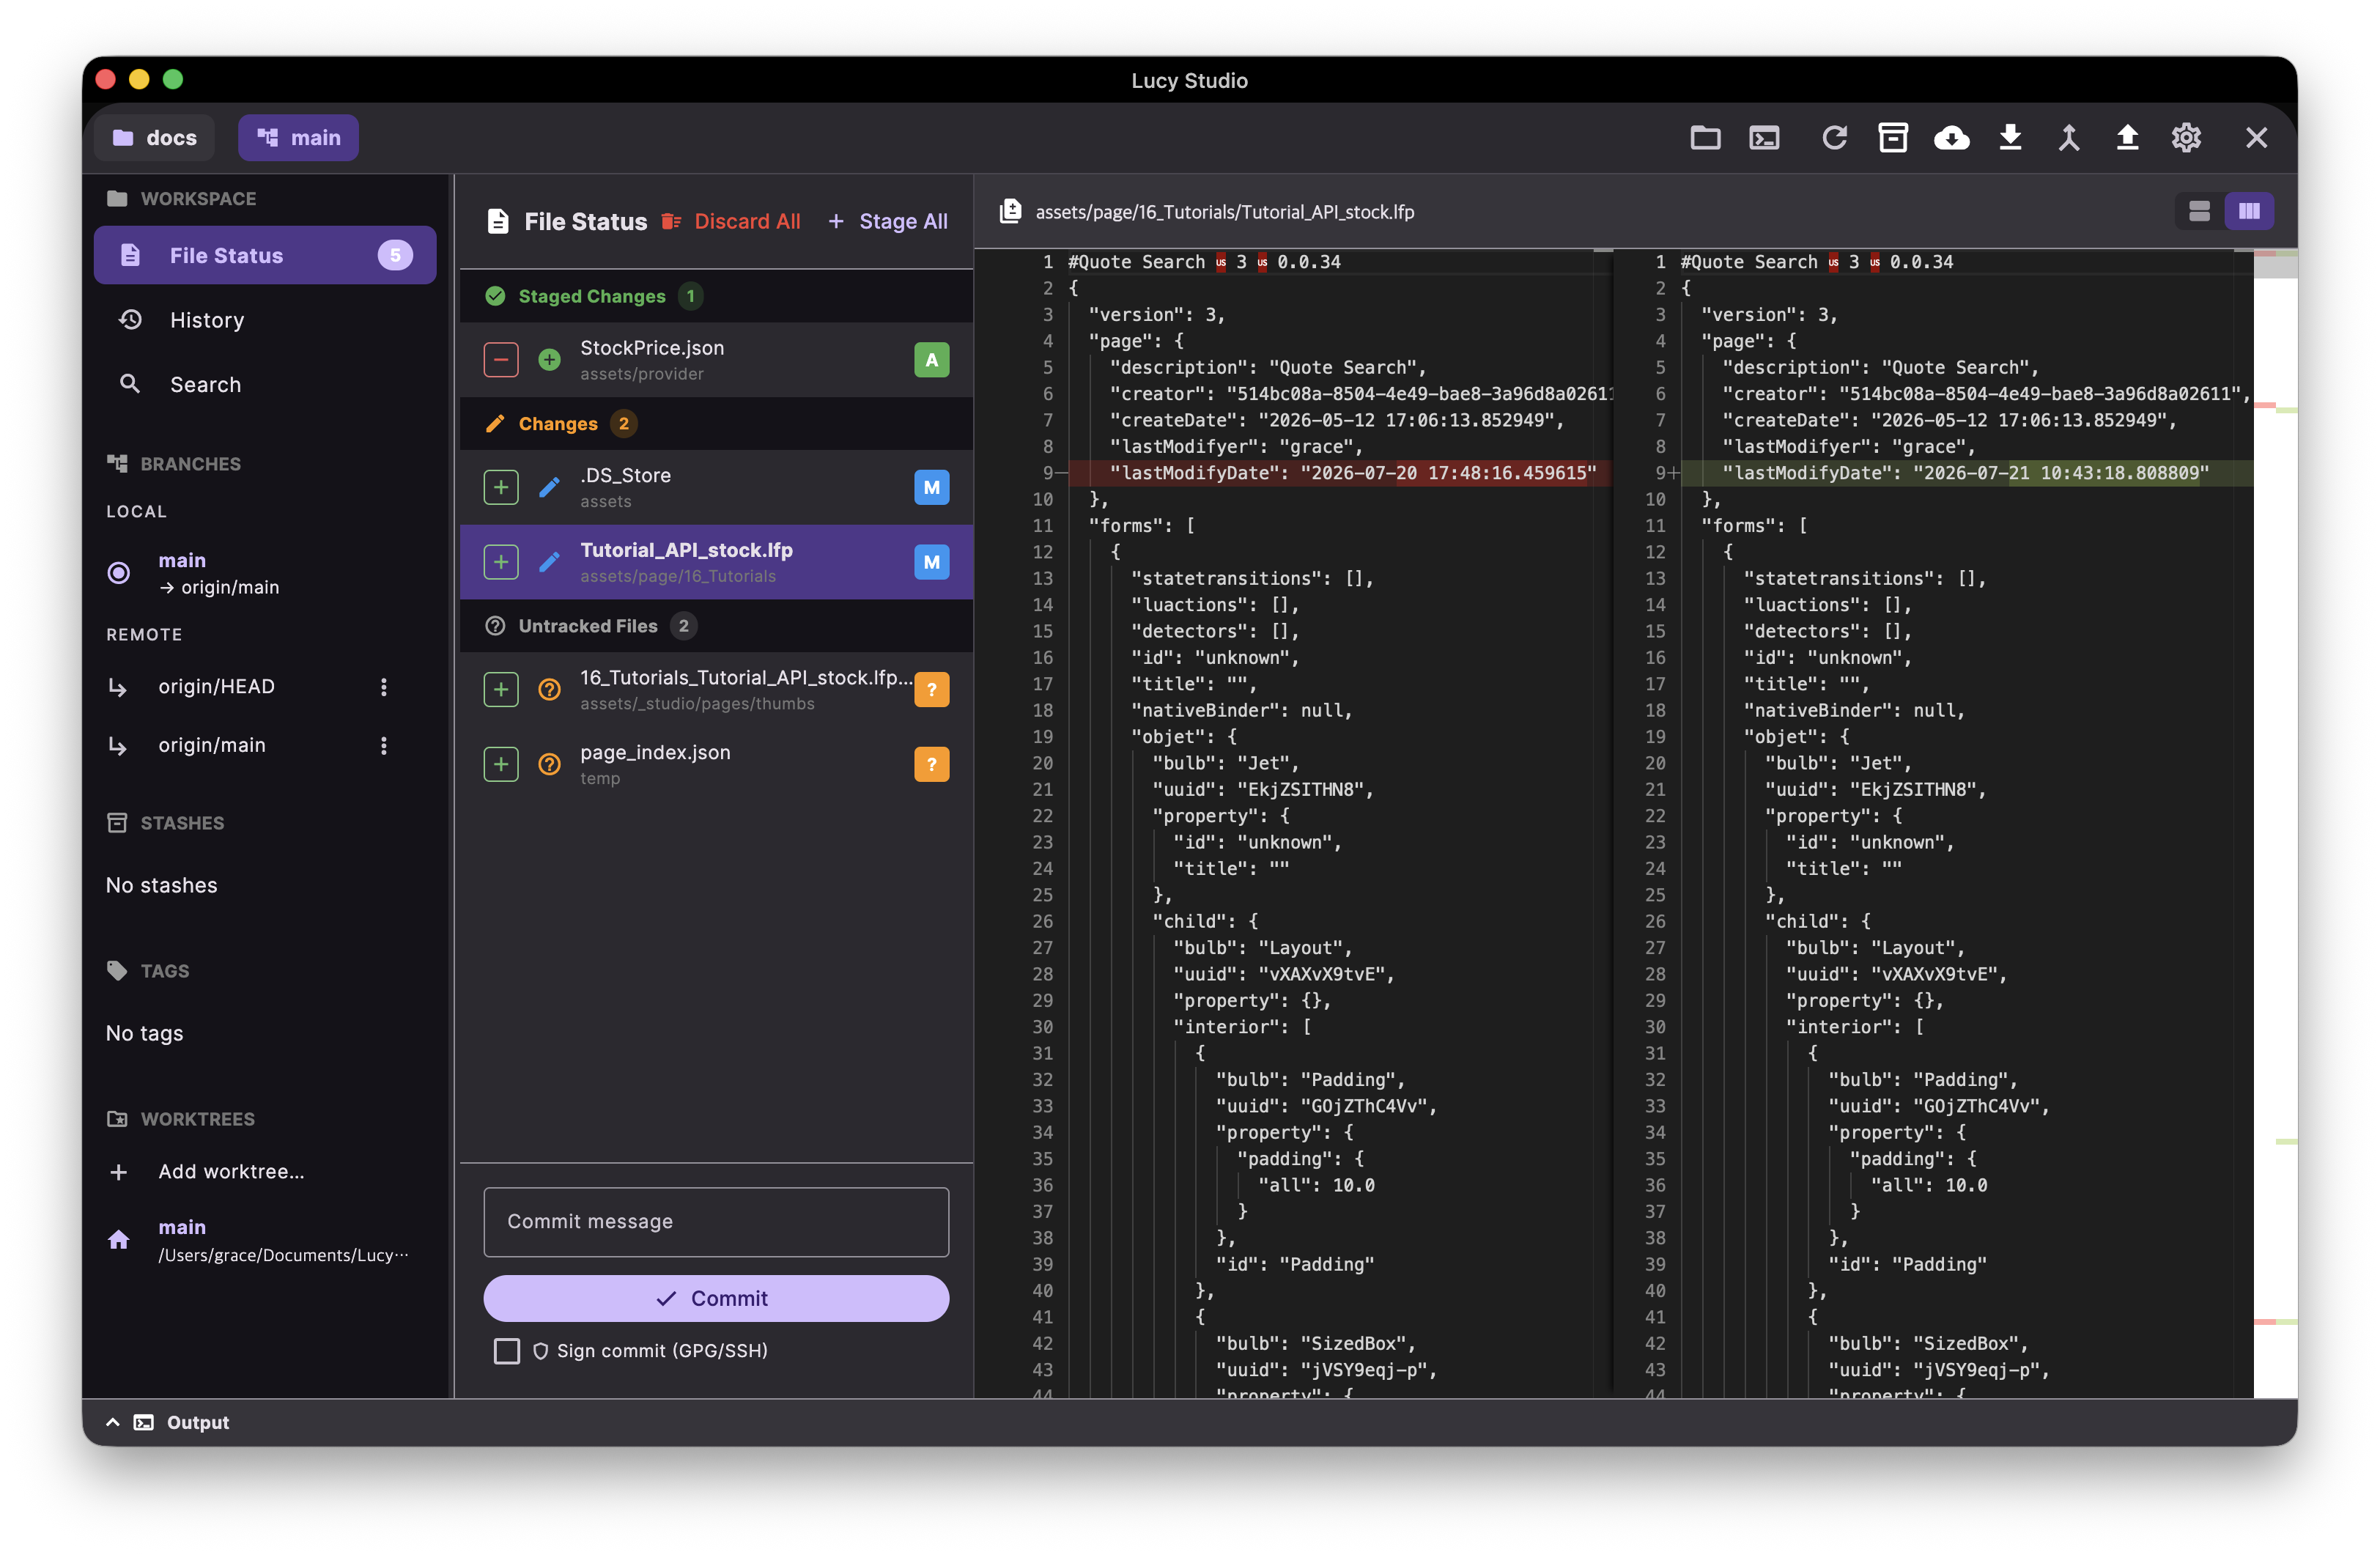
Check file status
Select File Status in the left sidebar to see everything that has changed in your current project at a glance. Changes fall into three groups:
- Staged Changes: files you've already marked to include in the next commit.
- Changes: files that were committed before and have been edited since, but aren't staged yet.
- Untracked Files: new files that have never been committed.
Click a file in the list to see what changed on the right.
Stage and discard changes

Choosing which files to include in the next commit is called staging. Click the + button next to a file to stage just that file, or click [+ Stage All] at the top to stage every changed file at once.
To cancel your changes and roll a file back to its previous state, use discard instead. Right-click a file and choose [Discard Changes] to revert only that file, or click [Discard All] at the top to revert every change listed in File Status at once.
Discarding can't be undone. Before you discard, double-check that you really don't need the change.
Fetch, pull, and push

Use the icons in the top toolbar to exchange work with a remote repository.
- Fetch: checks what has changed on the remote without touching your working files yet.
- Pull: brings the latest content from the remote into your working files.
- Push: uploads the changes you've committed to the remote so others can see them.
Click an icon to open a menu of its options.
Fetch options
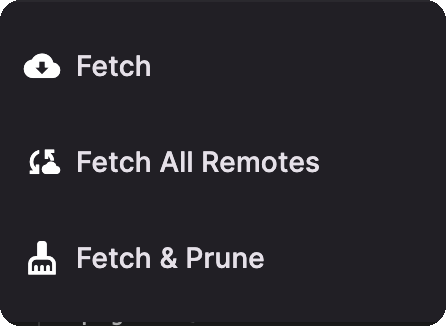
- Fetch: the default. Retrieves the latest information from the connected remote.
- Fetch All Remotes: when several remotes are connected, retrieves the latest from all of them at once.
- Fetch & Prune: retrieves the latest and also cleans up local tracking references for branches that were already deleted on the remote. This keeps branches that no longer exist on the remote from lingering in your branch list.
Pull options
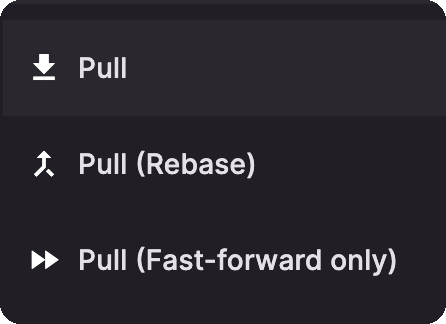
- Pull: the default. Brings in new changes from the remote and merges them with your local changes automatically. If the two branches moved in different directions, a merge commit records that they were combined.
- Pull (Rebase): applies the remote's changes first, then stacks your own commits back on top. Your history stays in one clean line, with no merge commit.
- Pull (Fast-forward only): runs only when your branch has no commits of its own that aren't already on the remote. It allows a simple "catch up to the latest" and nothing more — if a merge would be needed, it changes nothing and tells you. This is the safe choice when you never want to touch your history.
Push options
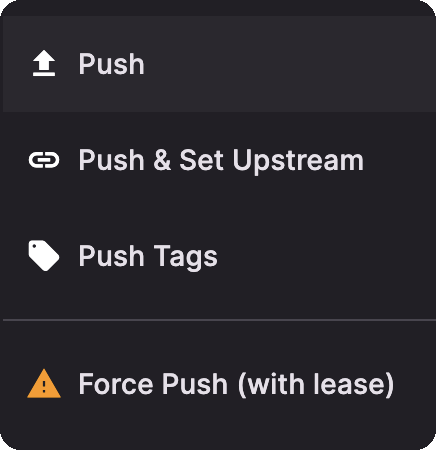
- Push: the default. Uploads your committed changes to the remote branch that's already connected.
- Push & Set Upstream: use this the first time you push a new branch to the remote. It also records which remote branch this one is paired with, so from then on a plain Push remembers where to send it.
- Push Tags: uploads tags (version labels) to the remote rather than commits.
- Force Push (with lease): overwrites the remote's history with yours.
Force Push can erase commits that someone else has already pushed. A confirmation dialog appears first, along with a warning that the action can't be undone. The "(with lease)" part blocks the push if someone else has pushed new commits to the remote since you last fetched — it helps prevent accidentally overwriting a teammate's work. We recommend using it only when you truly have to.
Merge branches

Click the Merge icon in the toolbar to open a window for choosing the branch to merge. Pick a branch and run the merge, and its changes are combined into the branch you're currently working on.
When the same part was edited differently on each side, a conflict occurs. Resolve each conflicting file by choosing one of the following:
- Accept Current: keep the changes from your branch.
- Accept Incoming: apply the changes from the branch you're merging in.
- Mark as Resolved: edit the content yourself, then mark it as resolved.
Build Template and Component Libraries
Register a set of widgets you reuse across screens as a single component, then reuse it anywhere. Components are organized into folders within your project.
- Group several widgets and register them as a component.
- Sort components into folders.
- Bring a registered component into another screen.
Integrate Backends, Auth, and Payments
Dedicated features for authentication (login) and payments are on the way within Lucy Studio itself.