Hello, Lucy (Quick Start | 10 - 15min)
Welcome to Lucy Studio!
This guide is for anyone opening Lucy Studio for the first time.
Build a simple Welcome screen yourself, and learn the essentials of Lucy Studio along the way.
Here's what you'll build:
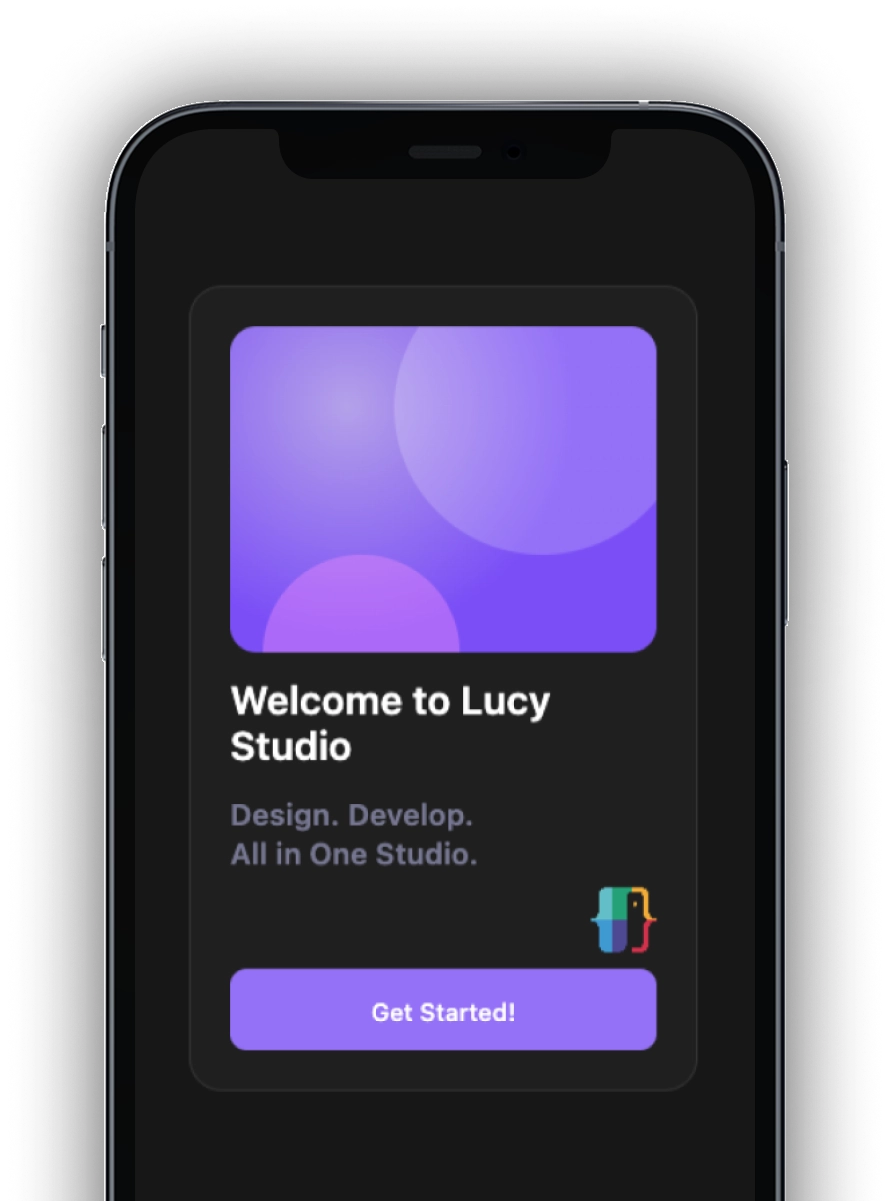
Follow the arrows, highlighted areas, and tooltips in each frame. Click the pulsing spot, or use the dots at the bottom to move between steps.
What you'll learn
- Build a layout with a Form Container — understand the basic structure of a UI
- Place and align Text — typography and hierarchy
- Add an Image and a Button — work with interactive elements
- See the finished design — check what Lucy Studio produces
What you need: Lucy Studio, installed
Before you start
✅ Is Lucy Studio installed?
If not, read the installation guide first. (2–3 minutes)
Step 1: Clone the tutorial project and open the file
Goal: Open Lucy Studio, clone the tutorial, and open the tutorial file.
- Open Lucy Studio, then open the project folder you cloned.
- In that folder, find tutorials > quick_start_tutorial and click it.
- The screen below opens. Follow the tutorial in the empty space on the right.
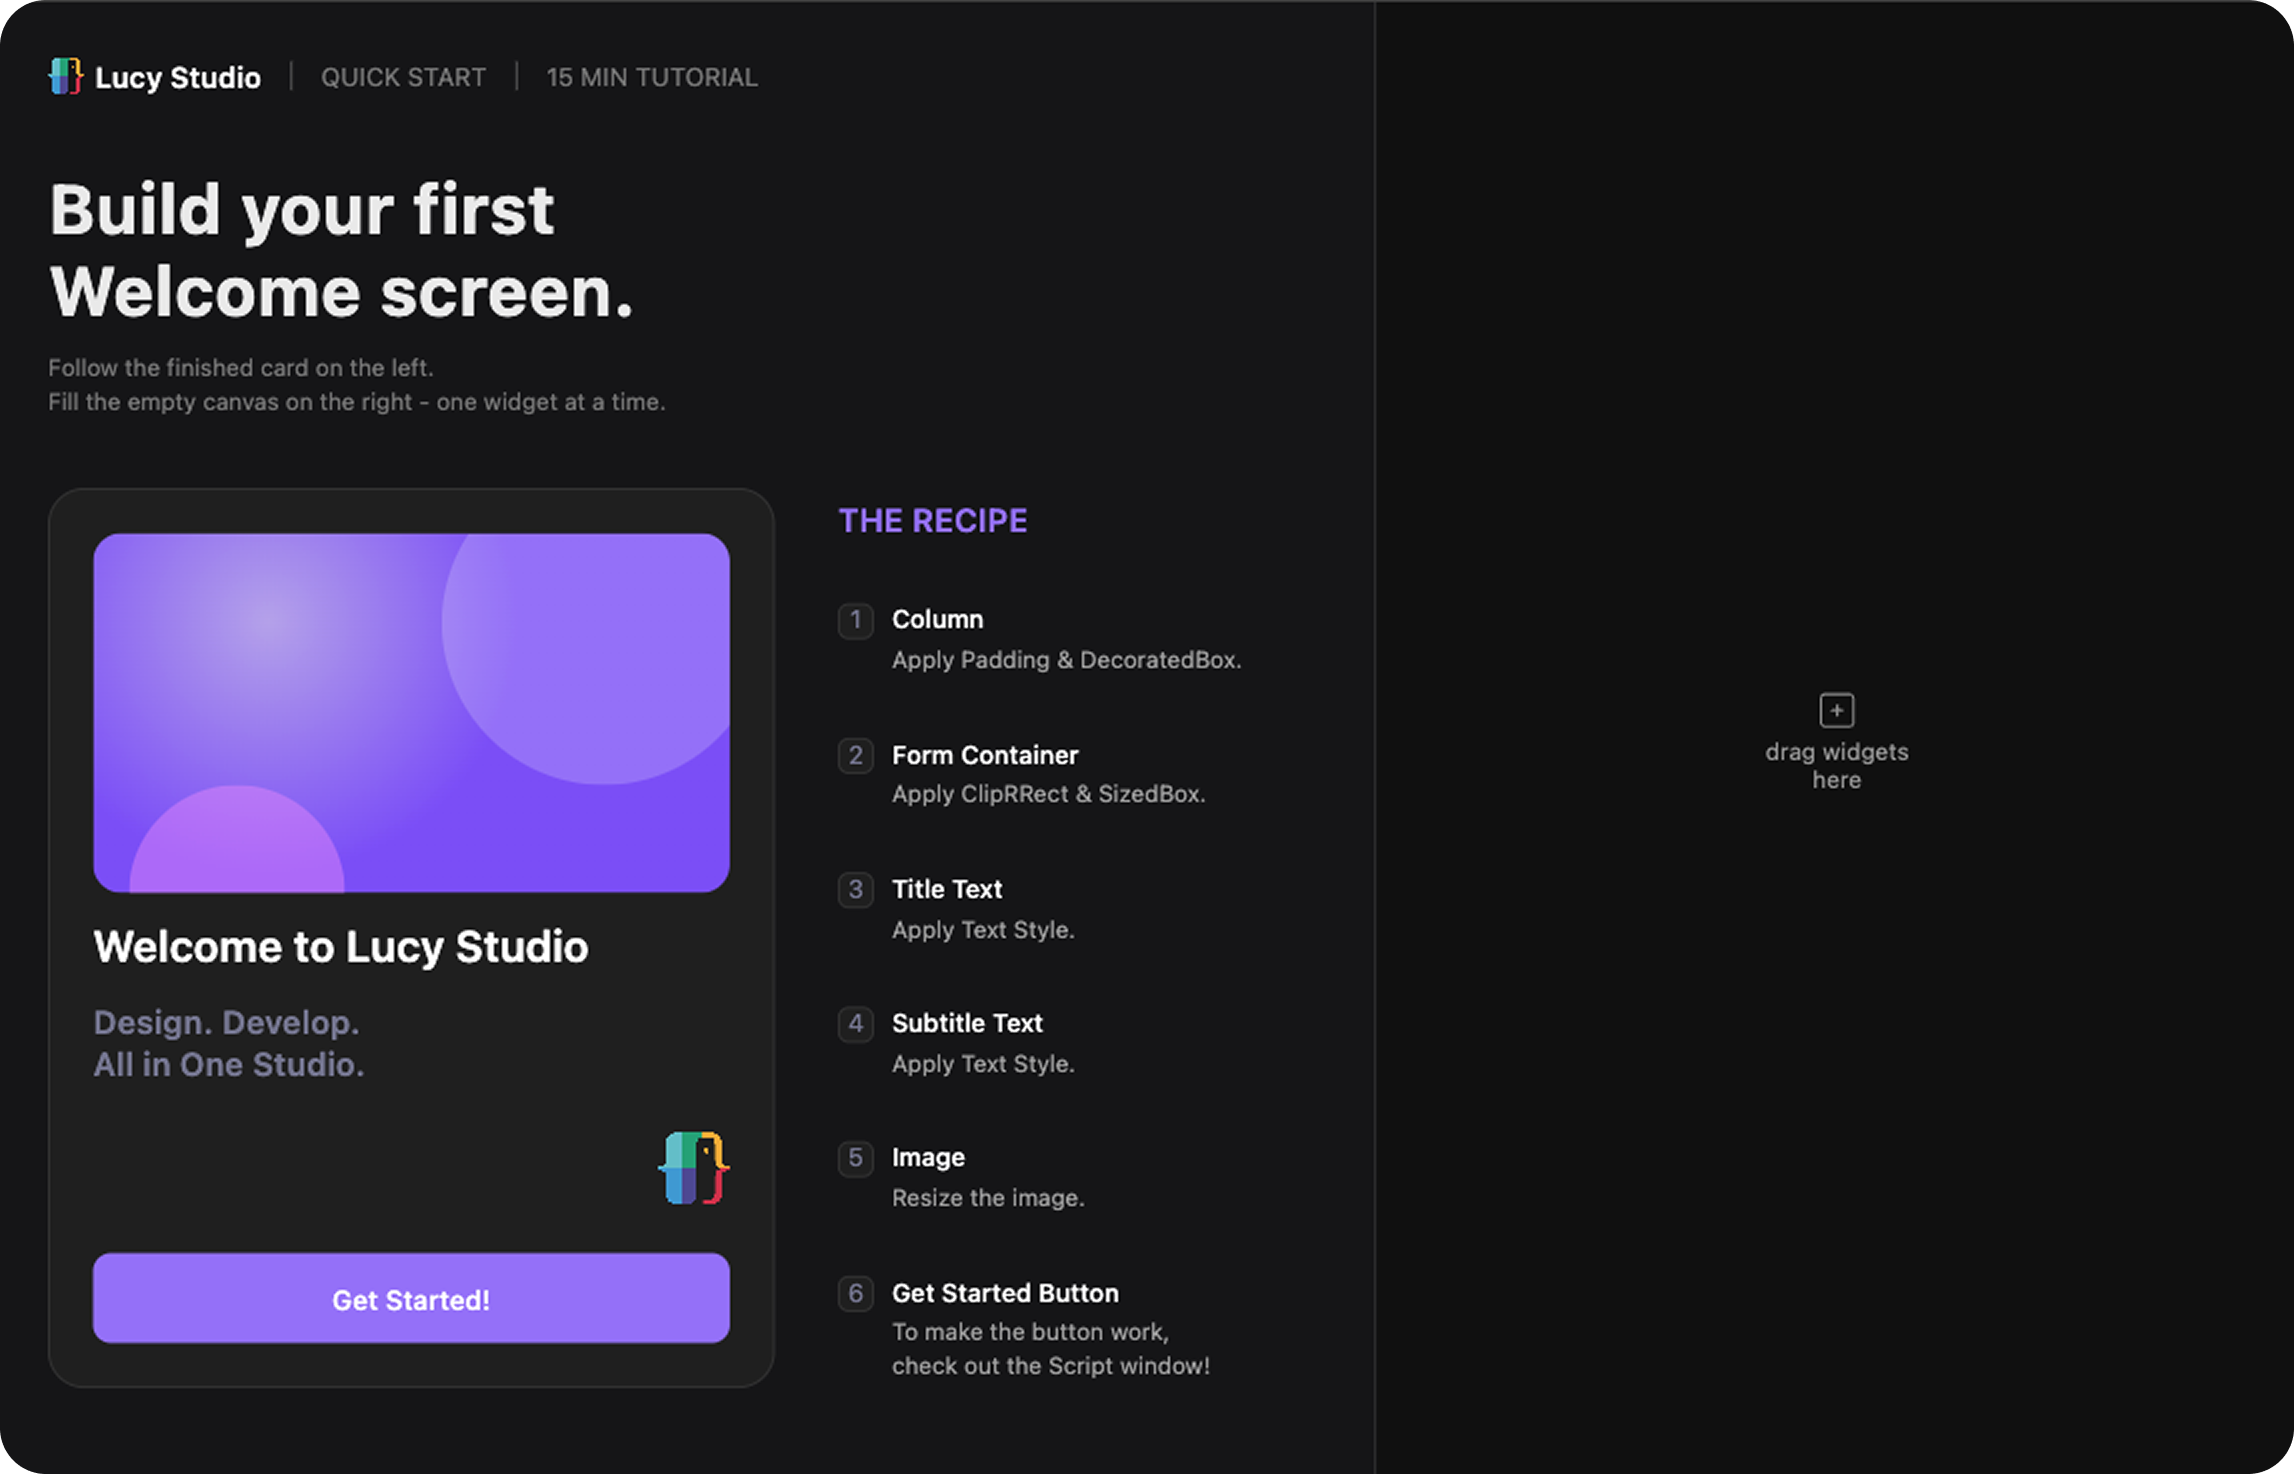
Step 2: Add a Column and a Form Container
Goal: Add a Column with a Form Container inside it to frame the layout.
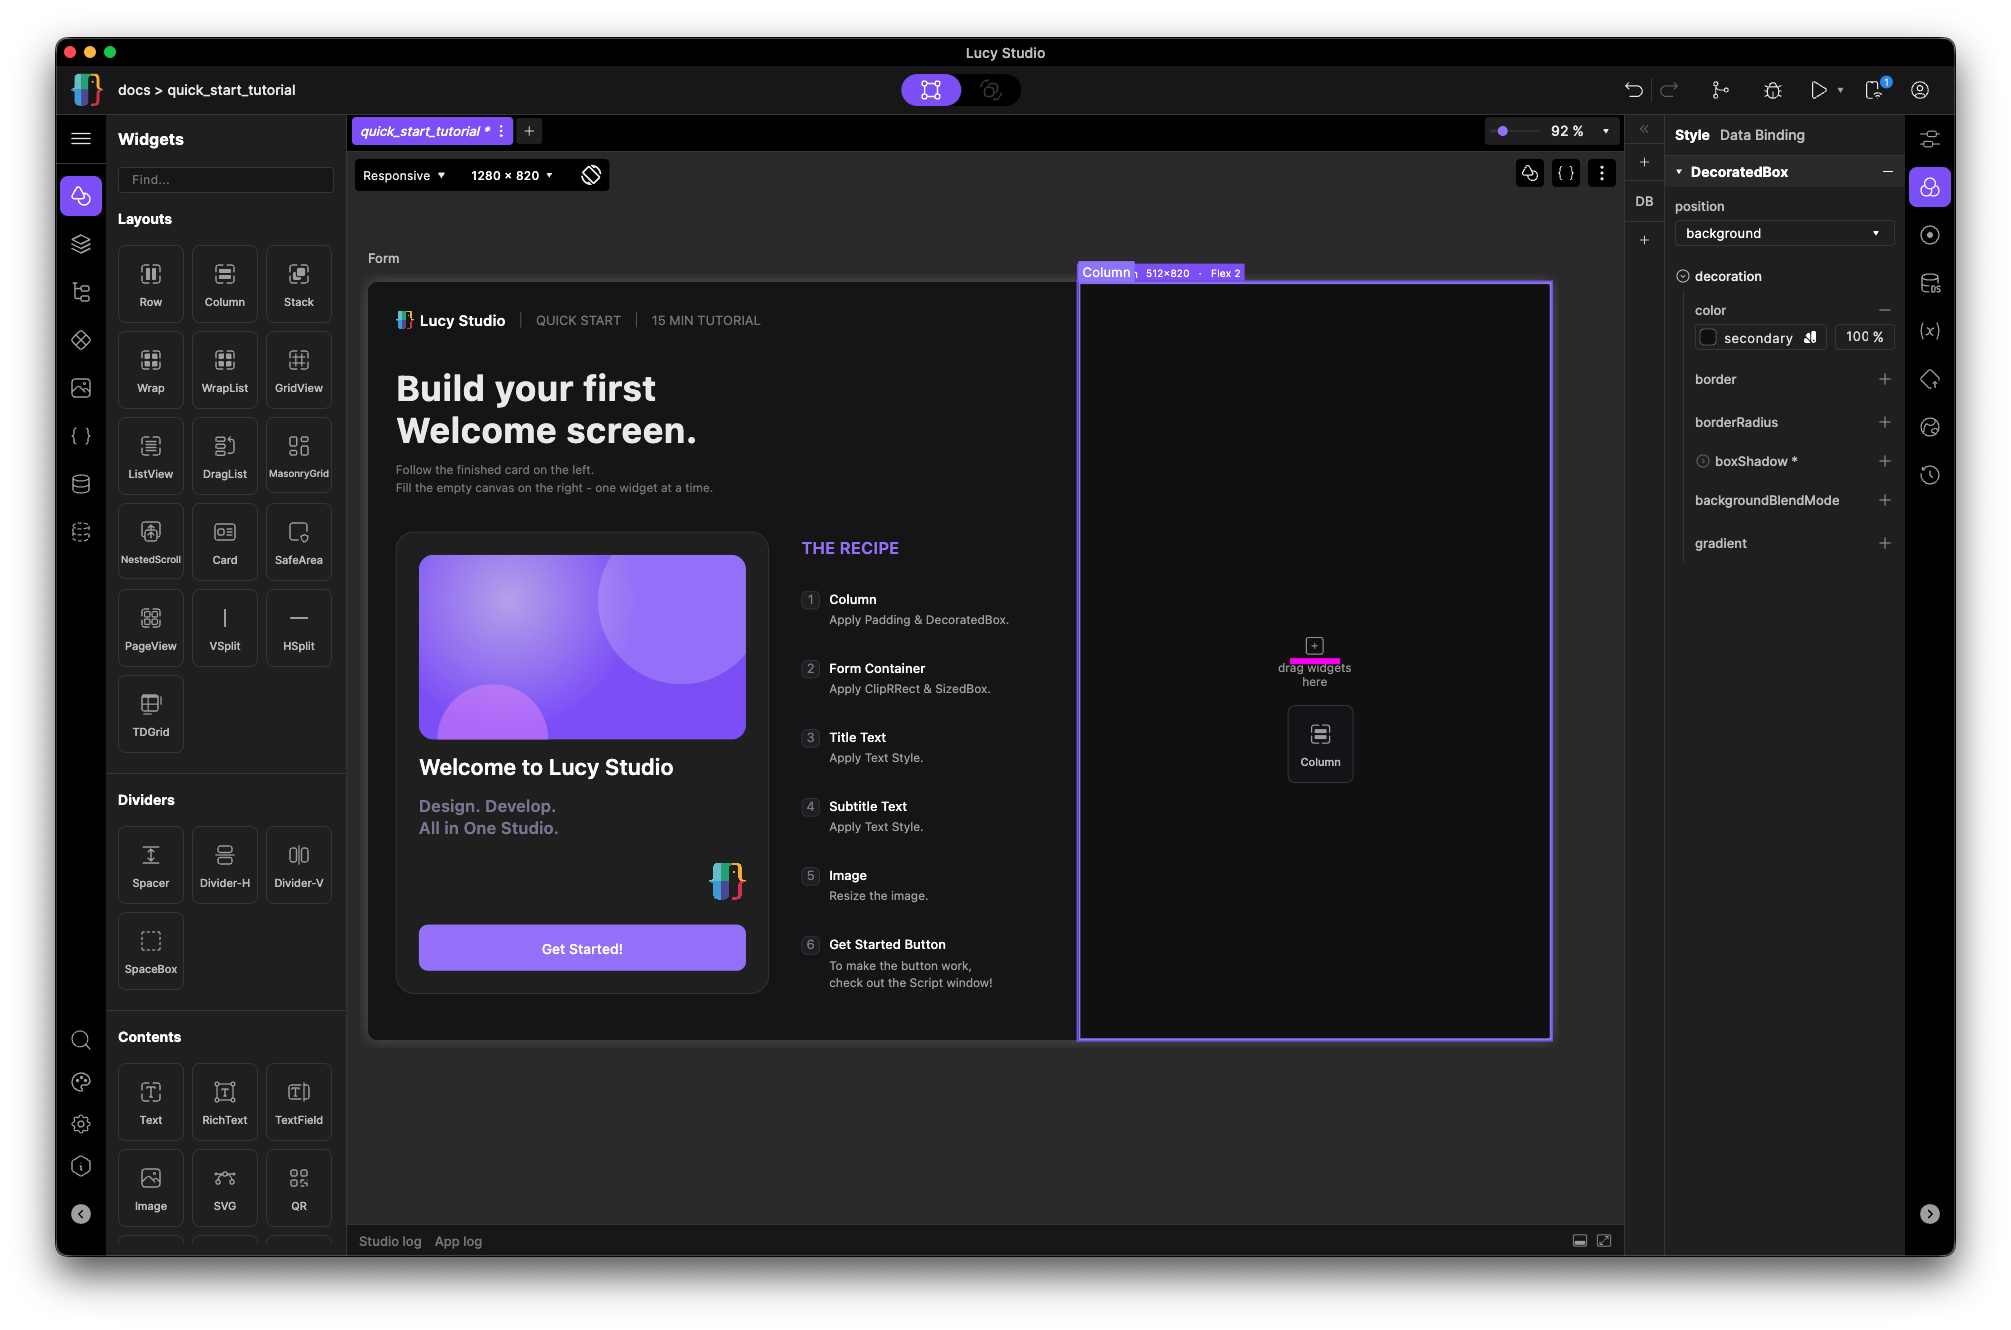
- From the Plate on the left, add a Column to the canvas.
- From the Plate on the left, add a Form Container (the Form widget).
- Select the Form widget, add a SizedBox in the Style Panel, then set the width to infinite (∞) and the height to 200px.
- In the Property Panel, enter formId — the path to the form lfp you want to load.
- In the Style Panel, add a ClipRRect and set its borderRadius.
- Select the Column, then add Padding in the Style Panel.
- In the Style Panel, add a DecoratedBox and set Color, Border, and BorderRadius.
- Click the example provided and you'll see color, border, and border radius already applied in the style panel. Look at the color and thickness it uses, then match them.
Step 3: Add Text widgets
Goal: Place a title and a subtitle inside the Column.
Add the title text
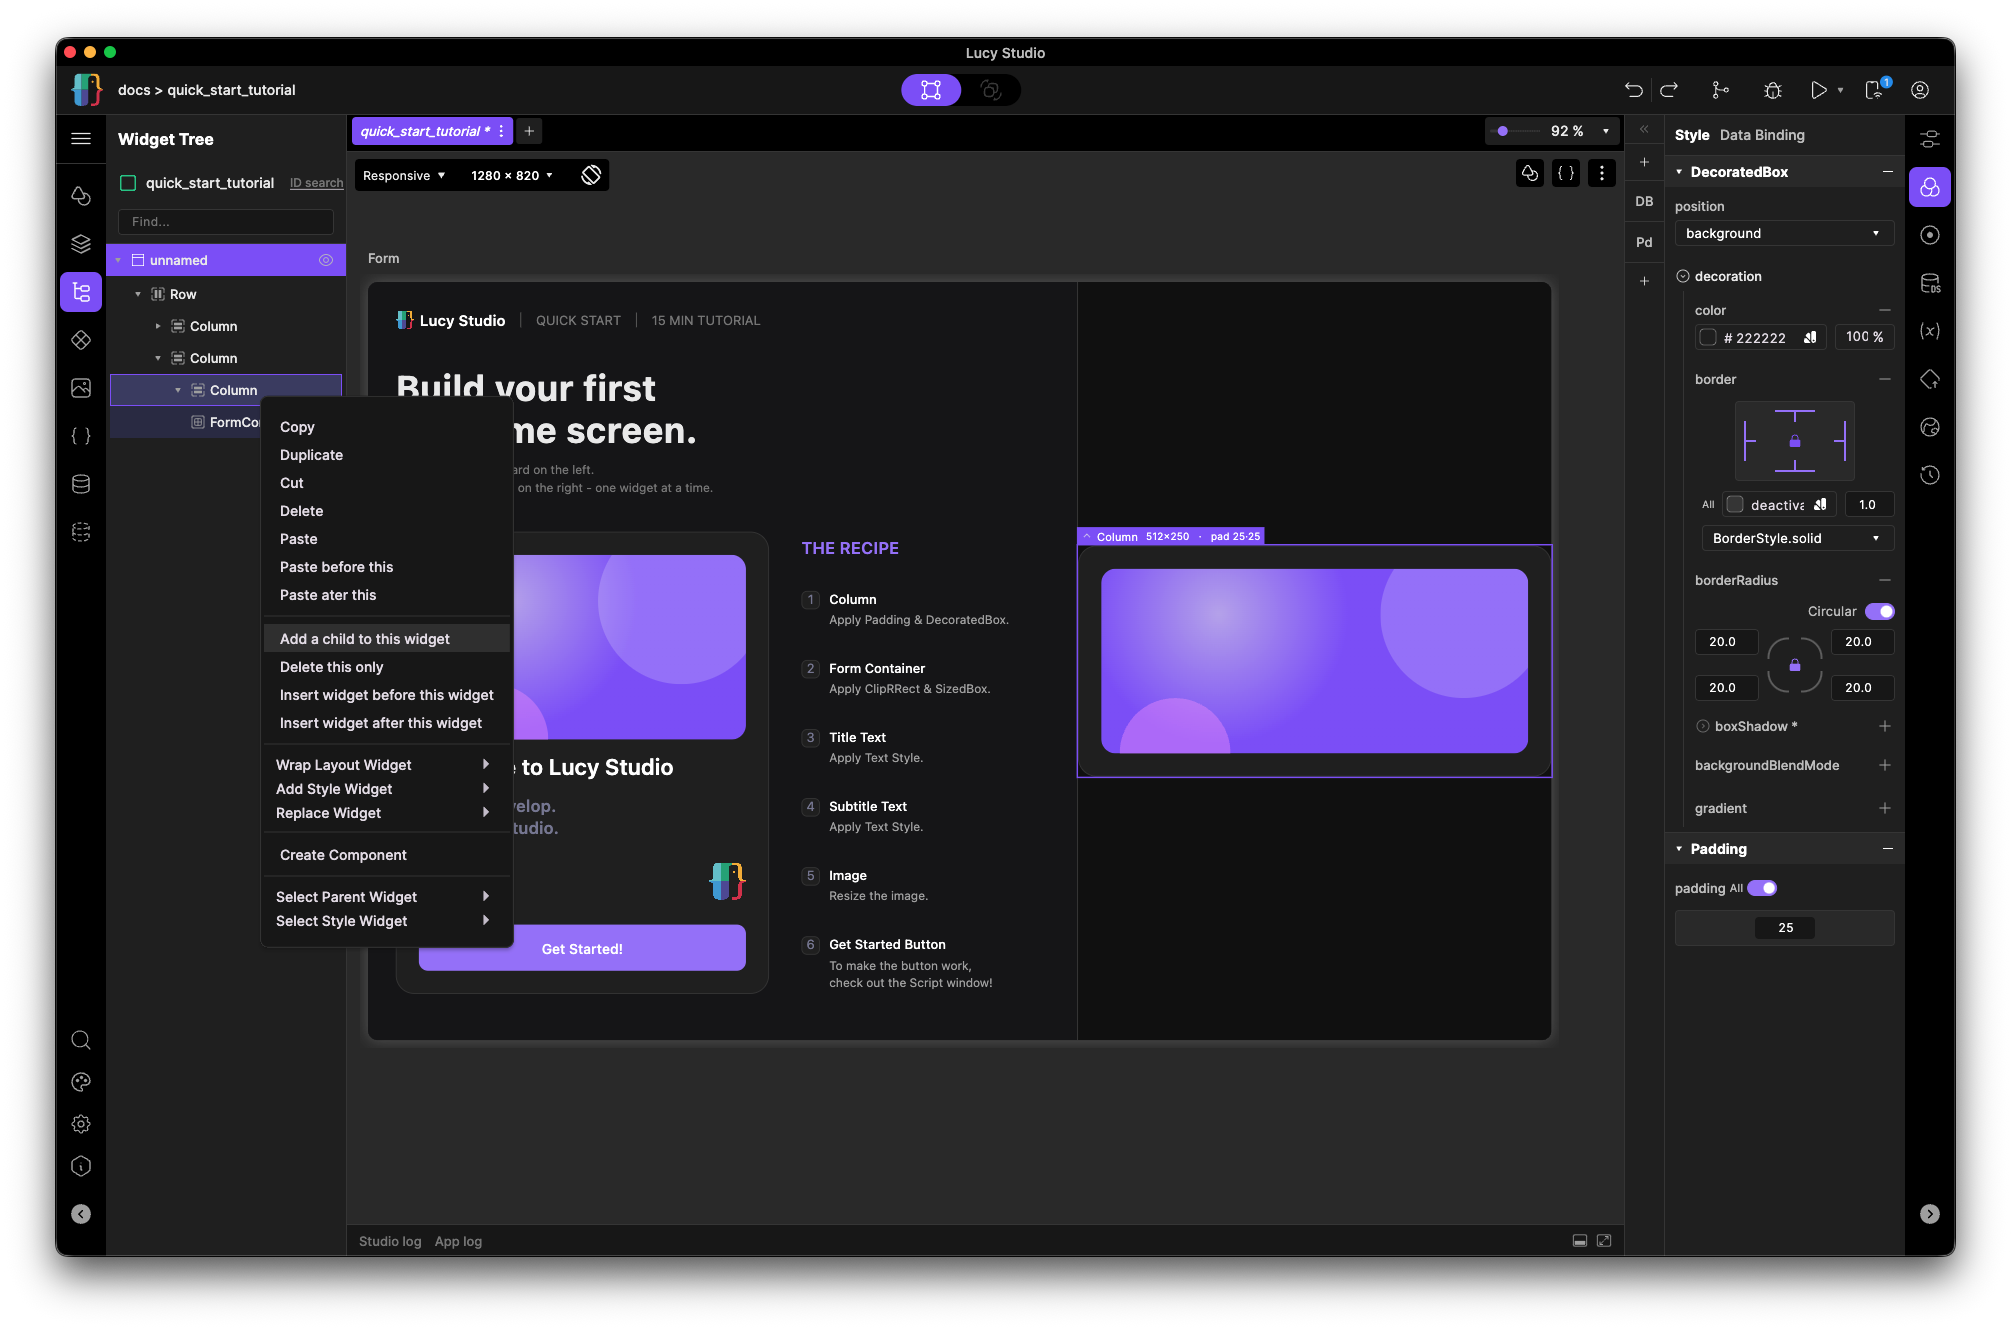
- Right-click the Column in the Widget Tree Plate on the left, then choose Add a child to this widget to add a Text widget.
- Select the new Text widget and set Text, FontSize, FontWeight, and Color in the Property Panel.
- Change the text to "Welcome to Lucy Studio".
Add the subtitle text
Goal: Add descriptive text below the title. Add one more Text widget to the Column the same way.
-
Select the new Text widget and set the following text in the Property Panel:
Design. Develop.All in One Studio.
💡 Important: This text has to render on two lines.
Step 4: Add an image
Goal: Add an image to bring a visual element into the screen.
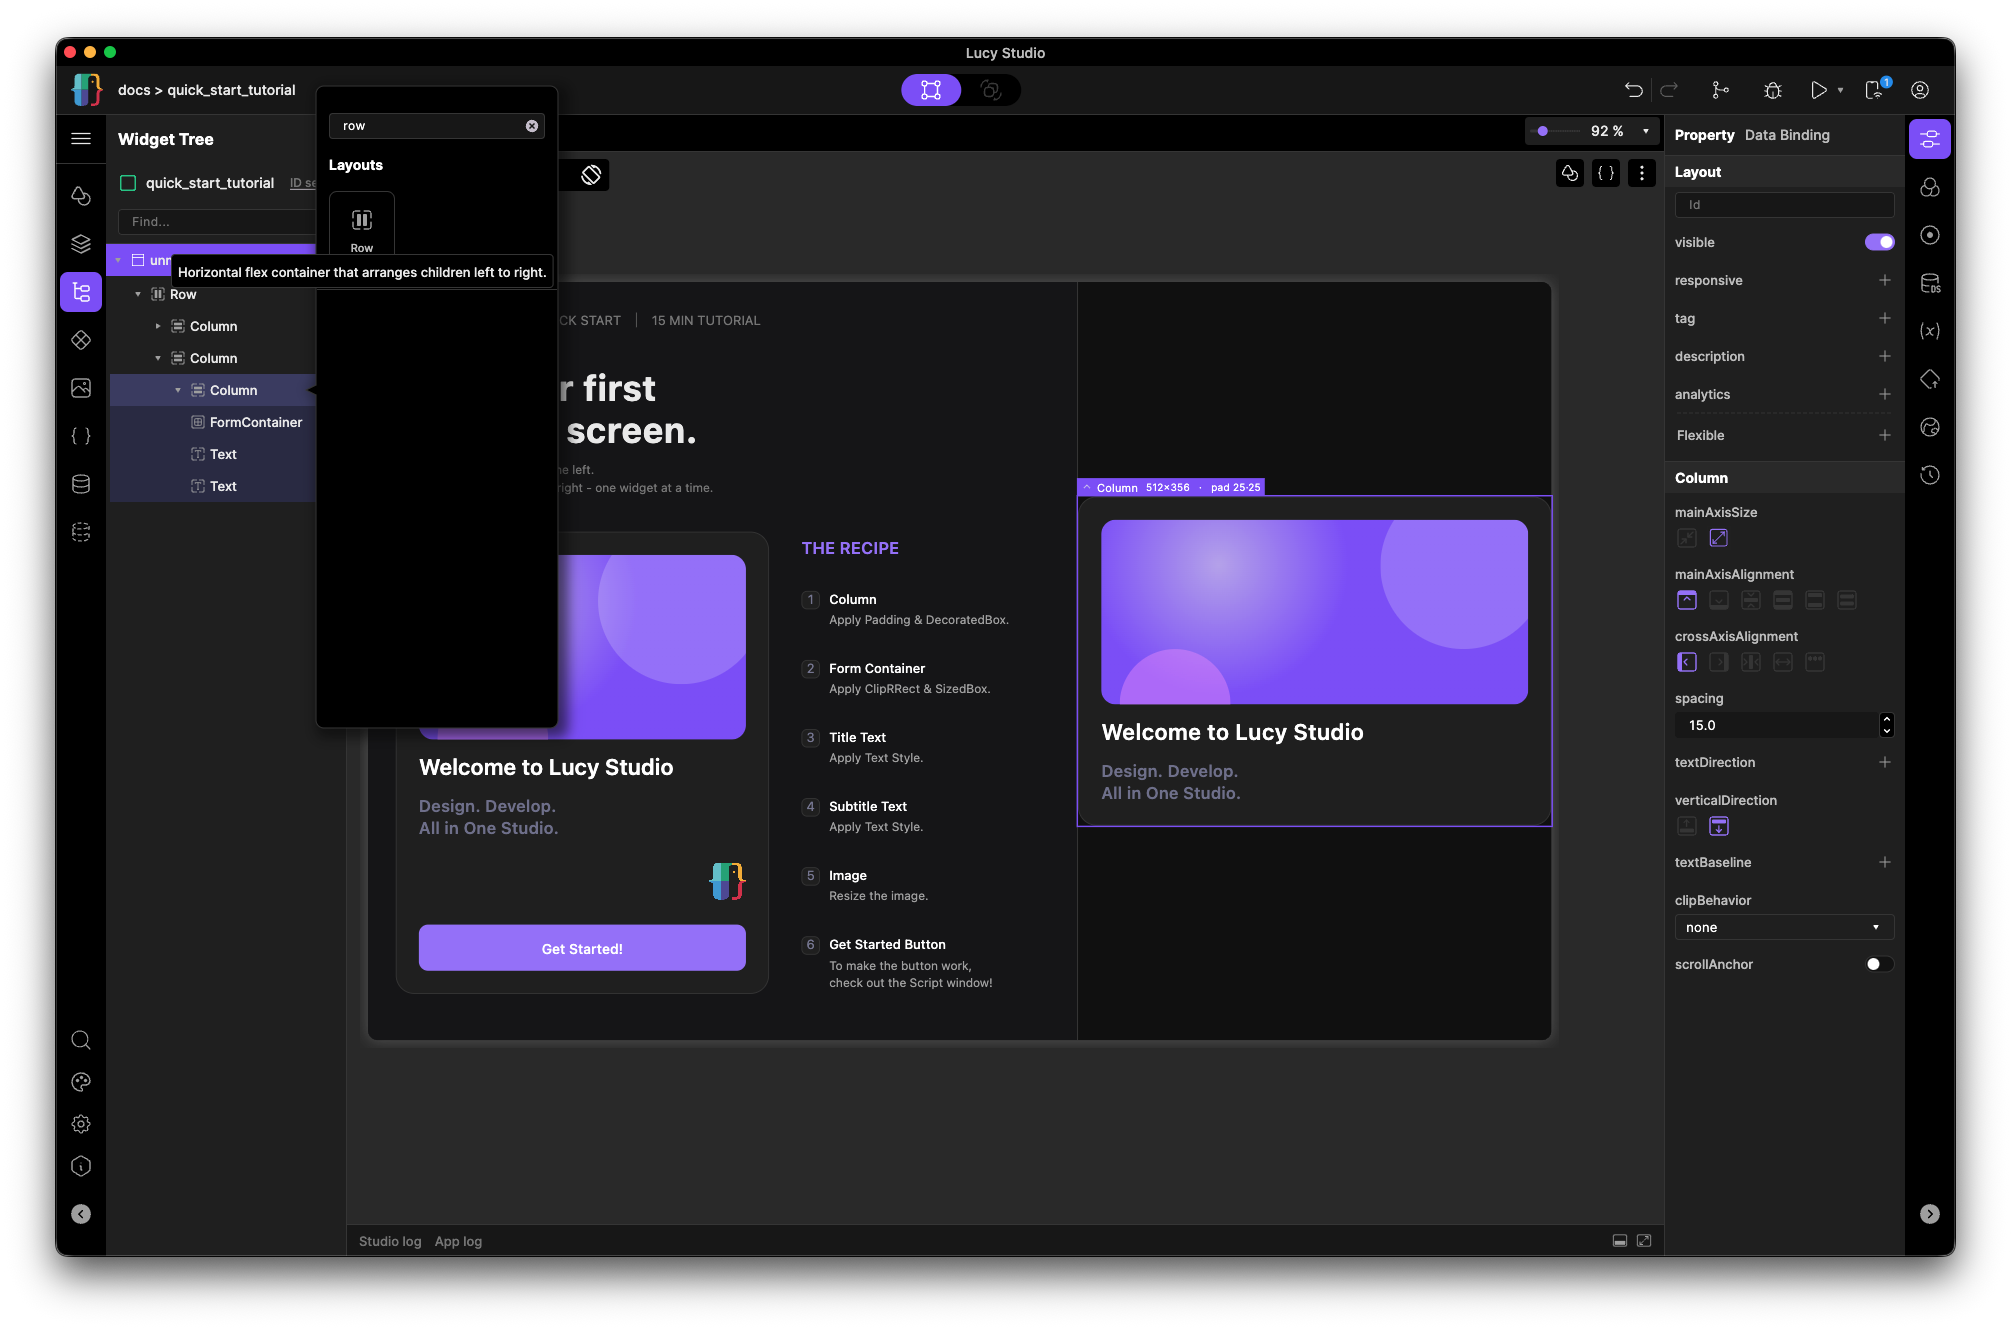
- Right-click the Column in the Widget Tree Plate on the left, then choose Add a child to this widget to add a Row widget.
- Drag and drop the Image widget from the Image Panel on the left onto the canvas.
- Select the Image widget and set its Size in the Property Panel.
💡 Tip: To resize the image, select it and set width/height in the panel on the right.
Step 5: Add a "Get Started!" button
Goal: Add an interactive element to round out the screen.
-
Add a Button widget to the Column in the Widget Tree Plate on the left.
-
Select the Button and set Size, Radius, FillColor, Text, and TextStyle in the Property Panel. (Use "Get Started!" for the text, and a shade of purple for the color.)
-
To make the Button interactive, give it an ID.
-
Open the script window and paste the short snippet below.
btn_get_started.onClick = function () {btn_get_started.setProperty('text', 'Welcome to Lucy Studio!');}; -
Finally, select the Column and add Padding in the Style Panel to tidy up the overall spacing.
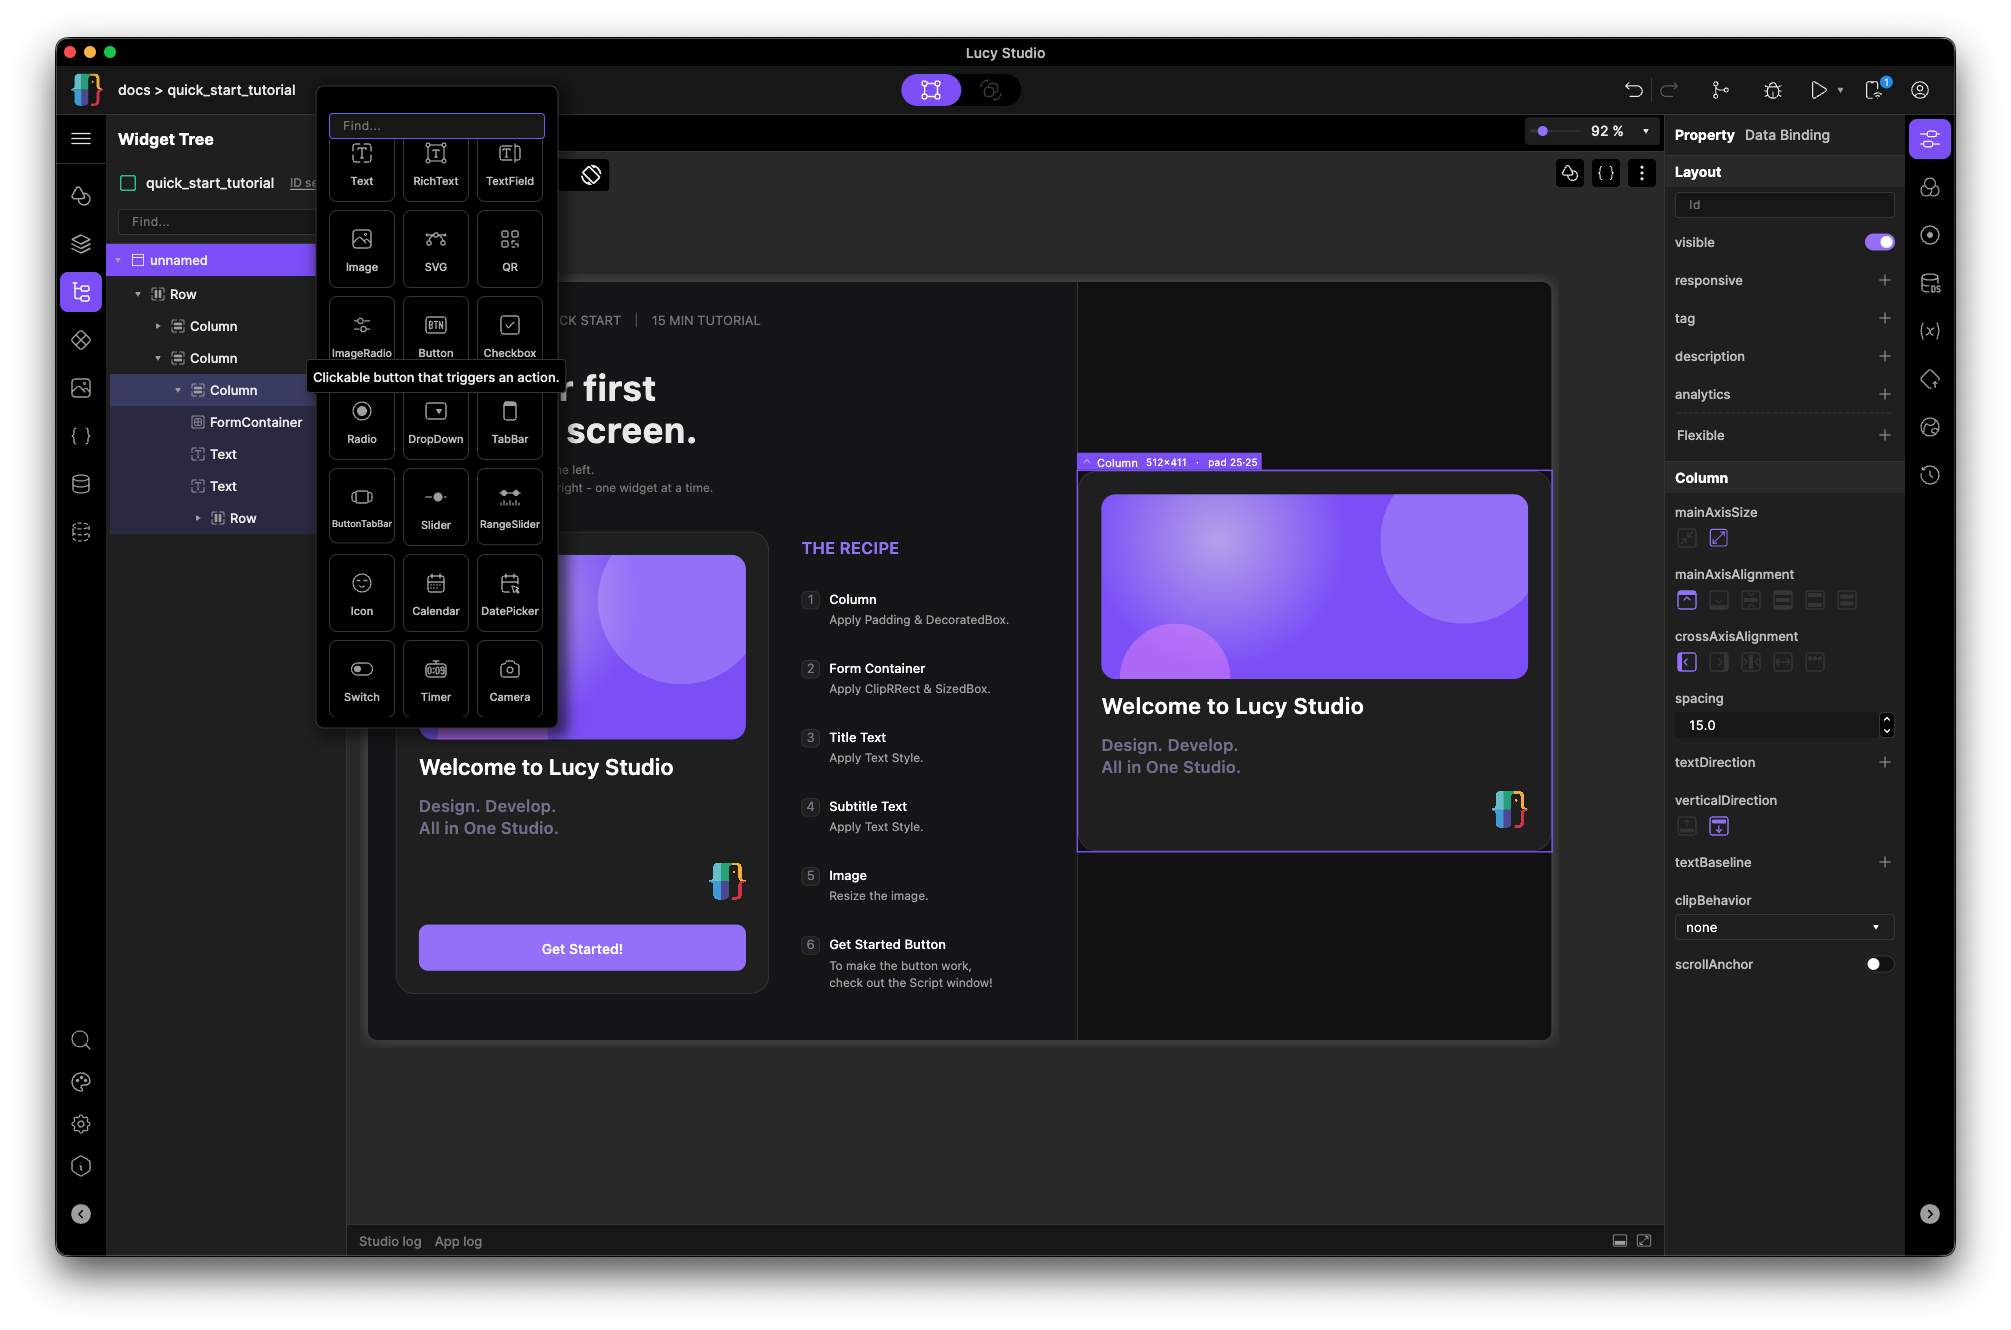
You did it! 🎉
This is the Welcome screen you built yourself.
Now run it on a device or in Lucy Player, and tap the button.
What you learned:
- ✓ Understanding layout structure with a Form Container
- ✓ Placing and aligning Text
- ✓ Working with Image and other widgets
- ✓ Making a Button interactive with a short Script
- ✓ Experiencing the core Lucy Studio workflow
What's next?
- Build your first CRUD App : 30-40min Tutorial (coming soon)